Well, to start, you need a couple of tools. First is MooMapper 0.90c. It's the mapping tool we use to place our object in the game and create it's directory files. To actually model your creation, I recommend SketchUp trial for you guys who are making landscape and buildings, then File -> Export to .3DS file. Once you've done that, or you just want to model a tube or box or something, you need to download ZModeler. I recommend ZModeler 1.07, since ZModeler 2 is a bit different so I can't guarantee this guide's accuracy. Once you have that, get a good Vice City IMG Tool. Google IMGTool20 to get the one I'm using. To make collision files, make sure you download both steve-m's colmaker 1.0 AND 2.0. You can get these from steve-m's main site (use google). Finally, download and install ViceTXD. It allows us to create the textures for our object. This sounds confusing, but it gets much easier when you do it once or twice. Got the tools? Good. Now, let's begin...
Getting Started
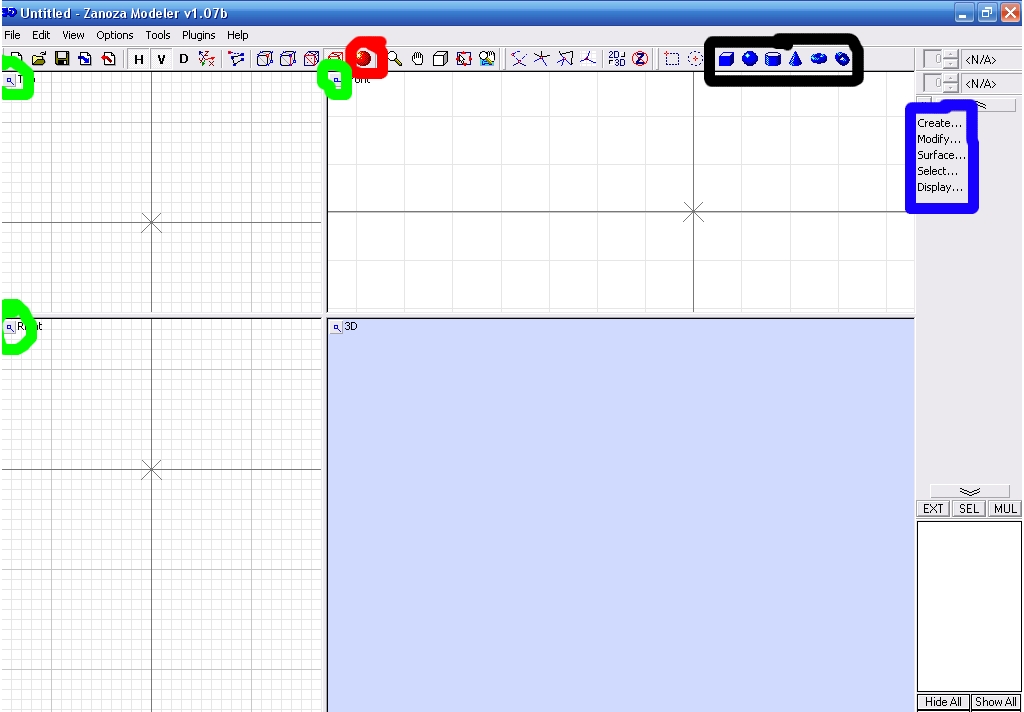
Blue: Tools
Red: Material Editor (Used for Texturing)
Green: View Mode (Left, Right, Front, Top, Bottom, etc.)
Black: Basic Modelling Tools (Shapes.)
Making A Basic Object
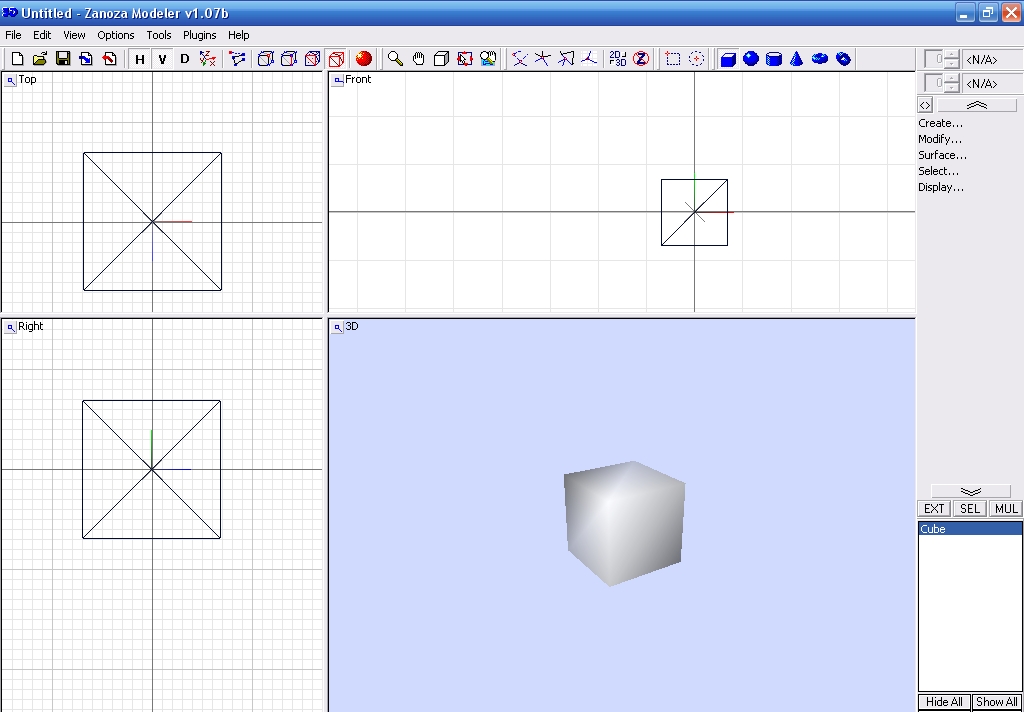
Alright, let's get ready to make some objects. I'll assume this is your first real attempt at modelling, so we're going to go slow. Start out by picking the Box tool. It's the cube in the blue circle in the picture above. Ready? Set one of the View Modes (green) to Top, and click the dead center. Pull down a little on the mouse to make a square. Then click when you've made a decent size one. Make sure it looks good in the 3D view (bottom-right block by default) before clicking. You can scroll in and out of the 3D view when you've made the box using the scroll wheel on your mouse. Good? Good. Bad? Press CTRL + Z to undo the box and give it another try. Ready to scale it?
Scaling
This is where it gets tricky. Minus this down for a bit, we need something from Vice City to compare sizes and change it as needed. Start up the IMG Tool 2.0. Do a File -> Open, and the default location is C:\Program Files\Rockstar Games\Grand Theft Auto: Vice City\Models\gta3.img. Open it up. It should show this:

Go to the top toolbar and click on Edit -> Find. Type in, let's say, police.dff, and hit Find Next. It should automatically scroll down and highlight a file named police.DFF. Right click this file and hit 'Extract.' Save it anywhere you can easily find. Now, minus this down and we'll head back to Zmodeler.
Now, with your cube up, go to File -> Import. Look for your police.DFF and open it up. It should (might) look like this.
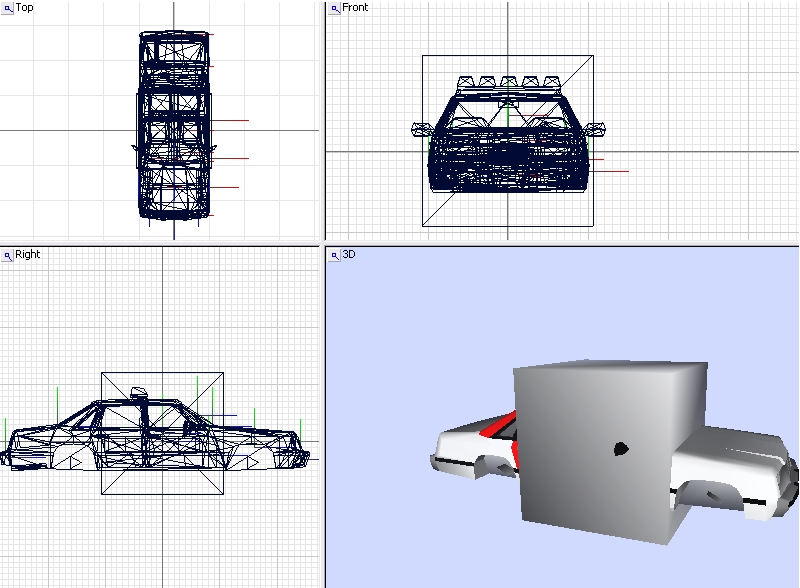
Well, looks like our box isn't so small. Let's fix that. See at the top, the icon that looks like this:  Select it, and go click on Select -> Single. In any view except 3D, right click your box. it should light up red. Now select Modify on the right side and hit Scale. Left click and hold your red box on any view except 3D and drag up or down until it looks about right. Scale for some reason tends to elongate one side of the object, so so little at a time on each view to make it perfect. If it's a little rectangular, well, that won't ruin anything. Remember, when you make a mistake, you can undo your last few changes using CTRL + Z. Now we have to erase the Police Car, we don't want that in our game. At the bottom-right corner, you'll see a button that says Show All. Press that. Then click the name of your object in that list to hide it. Don't worry, it's not deleted. Now, go to Select on the right toolbar and hit All. Right click any object in the viewer and it should all turn red. Hit your delete key while hovering over each part of the car with your mouse and it should all get removed. When every little piece of it is gone, then unhide your box by clicking the name of it on the bottom right again. You've just scaled your box.
Texturing
Alright guys, now we gotta make the box look like a box and not a white cube. Go up and click on the Materials Editor button (red shaded in sphere). This'll pop up.
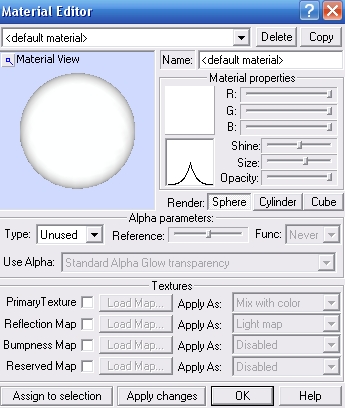
Alright, first off, the police car added many unnecessary textures we don't need. Hit the dropdown box at the top and delete everything in there. Be aware you can't remove
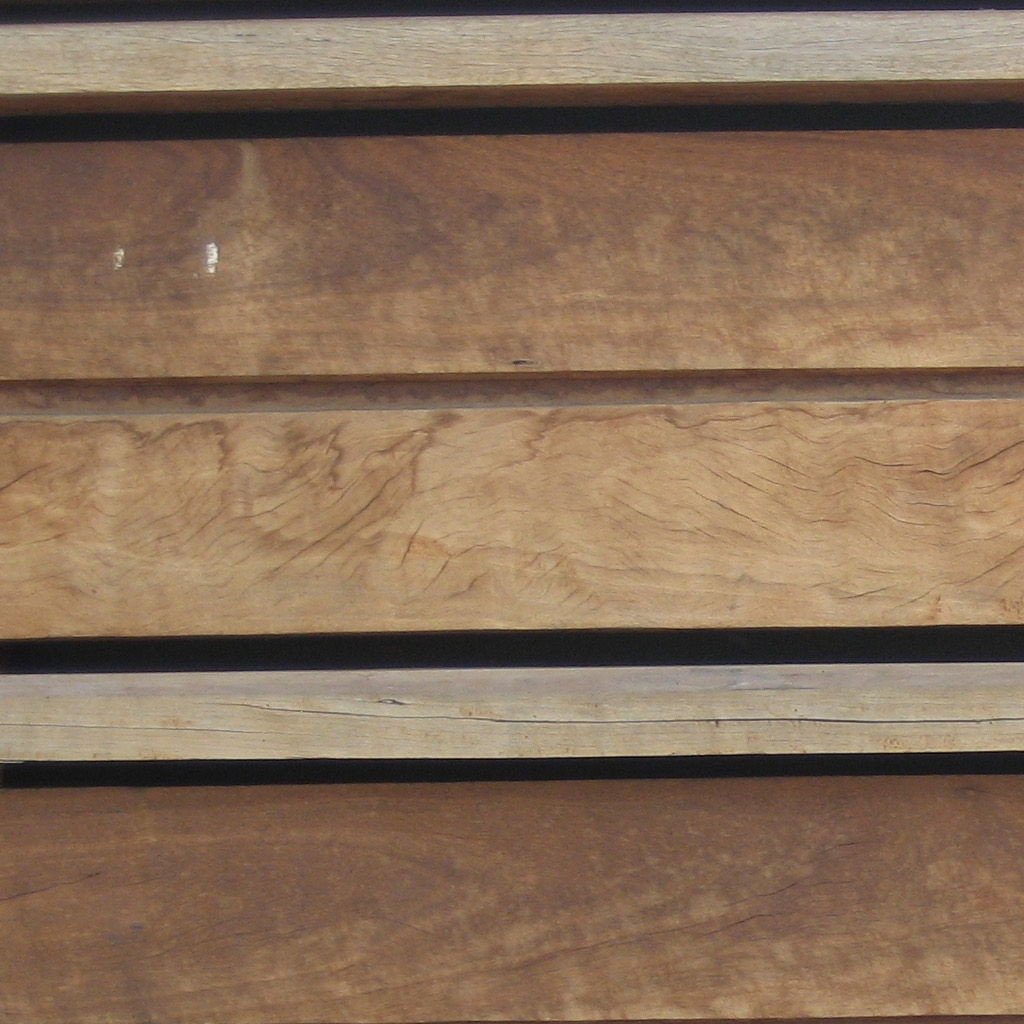
-It is in binary digits (try for sizes in 256 or 512, but 1024 will do as well)
-It can be tiled and won't look messy (dark on one side, light on the other should be avoided)
-It MUST be in .bmp format!
With these in mind, find your texture! I'll be using this one for the tutorial.
Now, with all these conditions met, it's time to start!
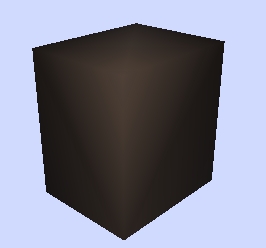
Go back to the Material Editor in Zmodeler. Make sure there is only
Well my textures are off. This means we have to do something pretty advanced. If your textures look fine, skip this whole section and read Exporting and Making a Collision below...
UV Mapping
Alright, this is a pain. I won't lie to you, this is pretty annoying. What makes it worse is you have to individually select every polygon, which sucks for you if you got a big object. Our box is only in the 30's, so we should be okay. Let's start this. Hit Select -> Single. At the top, click this:
All of the red circles are the same polygon. The line in the UV Mapper View is the polygon looking from the top down. In here you can scale, move, rotate it, whatever, just make it look good on the 3D view. To manipulate a polygon in the UV View, you need to go back to object mode (
And now I'm done.
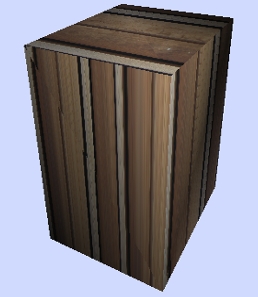
No, it's not perfect, but 15 minutes of UV Mapping made it look pretty good if I say so myself. Well we're done here and I think if you could accomplish this step you're going to be pretty solid from here on out. Take a few aspirin and let's keep going.
Exporting and Making a Collision
This is where just about everyone screws up. One slip here means you gotta check your whole model over and make sure it meets all the conditions for it to be compatible for Vice City. Before we export this, make sure:
-Your model was textured and is UV mapped if necessary.
-Under Material Editor, the texture name is the same name as the one you're using and ends in .tga instead of .bmp.
-The amount of polygons is under 2000. (You can check this by right clicking the object name in the list in the bottom right corner and hit Properties.
-It is scaled and is the correct size for Vice City.
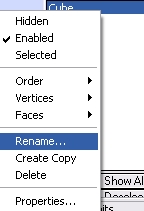
Got everything right so far? Well, let's see if you can keep it up. Now, in the lower right list in the corner, rename your object to whatever your model file's name is going to be, the texture file's name will be, and most importantly, the collision file's name. Basically I'm going to name all my files in this tutorial 'Crate' to avoid any errors.
With that done, go to File and click Export. First off, we're saving our model. This is the last time you can make changes to it, so make sure. Anyway, click Export and I'm naming mine crate. Where the dropdown box says to pick a file type, pick Grand Theft Auto (*.dff; *.col). At the end of your file name, MAKE SURE TO TYPE .DFF. My object would be named crate.dff in the space it provides. When you're sure it's correct and named the same as your object name, export it. Click Vice City and lock the file if you don't want anyone to edit it. Don't bother locking it, since you're not going to release your first box =P. Well, you made a model that's ready for Vice City. But now we have another challenge to do - make the Collision file. Even though Zmodeler says you can export to .col, it can't, don't try it. We're going to hit File and Export once more. This time, mine will be named crate.x and the file type is DirectX File Mesh. This is what we're going to be using in just a second.
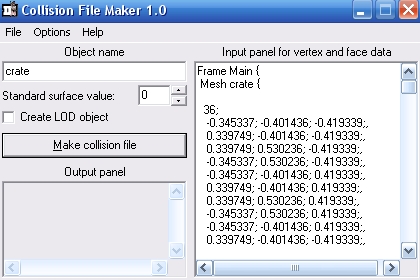
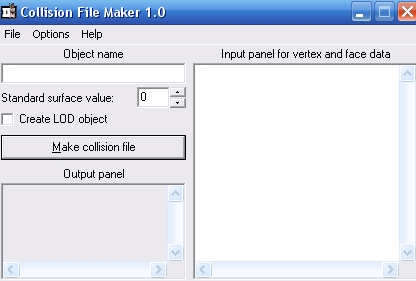
Alright, this is where it's still simple. Enjoy it, it's going to get rough soon. Load up steve-m's colmaker 1.0. It should look like this. (If it's in Dutch, go to Options -> Language -> English.
Alright, go to File -> Load Text. Open up your DirectX Mesh now, and you'll see tons of crap pop up in the pad in the right side. At the top, where it says Options, click that and click Mirror... Then just tick the X Axis box and click Ok. Where it says Object Name, type in (you guessed it) your object's name, for me is crate. This is where it gets pretty hard. You have to remove tons of lines of vertexes and stuff to make sure this goes right. Let's start.
We're not done yet. Now look at the third line. you should see a lone number with a semicolon after it. Delete everything above that, so the first line for me is 36;. Still not done! Alright, now is the big finish - scroll down until you see MeshNormals {. Delete this line and everything BELOW it. Now click Make Collision File and save it somewhere. We're done with Colmaker 1.0. Get ready for 2.0.
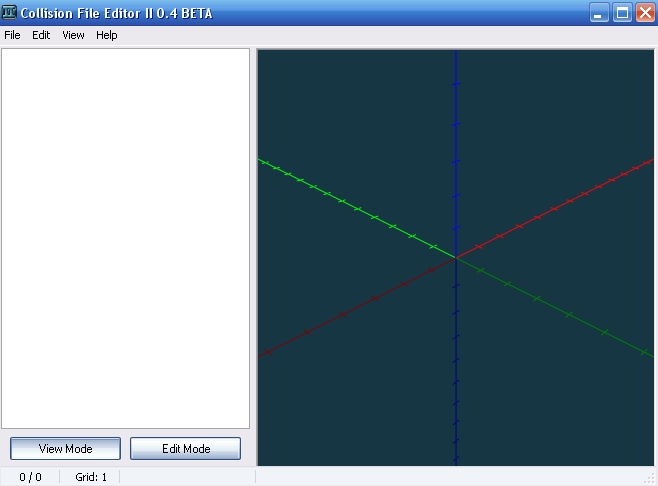
We're almost done with collision. This part's easy and pretty neat. Fire up Colmaker 2.0, which'll look like this:
Do a File -> Open, then select the file 1.0 just made, which for me is crate.col. Pretty neat, huh? Well, switch to Edit mode, then click the Face tab. Click All under the Select section. Scroll down a little and click the SA/VC button. Click the button below that where it says Default [default], and pick the material of your object. Grass types kick up grass and cause tire tracks on it, sand causes dust to be swept up behind it, and so on. For brightness, set the meter at around 1/3, which is a good medium. Now, where it says Edit Selection, click the Flip button, to flip the faces. They're reversed when they're loaded in this editor. Now right click the name of your model in the top list and go to Mirror -> X Axis to flip the X Axis. Right click your model again, and click Copy as LOD. This makes it solid from a distance when VC uses basic textures to make the game lag less. Save the collision and you can exit. You just did the (second) hardest part in modeling.
Setting Up a Texture File
This section is simple and small. Just pull up ViceTXD once you installed it, and go to File -> New. Save your file the same as the .col and .dff, in my case it would be crate.txd. Now go to Dictionary -> New Texture. Click the button that says Browse next to Texture File, and add the picture you used way back in Zmodeler as a texture and click Create. You don't have to fill in anything else. Just close out ViceTXD since it auto-saves. There you go.
Prepping and Editing the Directory
Alright, now we're going to add both the .dff and .txd files to the main directory of models and textures. The problem is, the game's Read Only, so we can't change anything. Well, let's counter-act this. Open up My Computer, and go to C:/Program Files/Rockstar Games. In here, there should be a single folder called Grand Theft Auto: Vice City. Rick click the folder and hit properties, then uncheck the box that flags this as Read Only and hit apply. Set the bullet to affect this folder, subfolders, and files. Now we can edit the game's files with no protection on them. Open up the IMG Tool 2.0. Go to File -> Open, and open the gta3.img file up, which is located in C:/Program Files/Rockstar Games/Grand Theft Auto: Vice City/Models folder. Go to the Commands tab and hit Add. Select and add both your .dff and .txd files, so I have to add crate.dff and crate.txd. And to save this file, we go to Command -> Rebuild Archive. This takes a minute or two and can drastically slow down your computer so I don't recommend to do anything else while this is rebuilding. When that rebuilds, you can just close out the IMG Tool. We're almost done!
Defining Objects & Using MooMapper
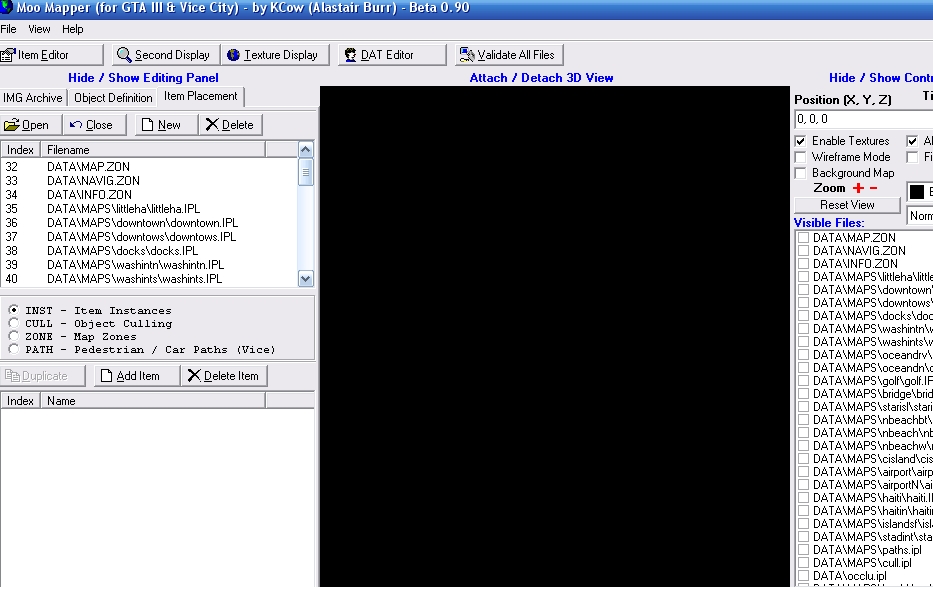
Before we even touch MooMapper, we have to make a directory for our map. In Vice City (and all GTA games) there is a maps folder with small folders inside for each section of the game. Well, we're only making one object as a test so we're only going to have one object in our maps folder. Navigate yourself to C:/Program Files/Rockstar Games/Grand Theft Auto Vice City/data/maps. Right click anywhere in here except on a folder or file and hit New -> Folder. Name it.... Well, I'll name mine crate, same as everything. In our folder, copy and paste in our collision file, so I'm adding in crate.col. Done? Now we can finally load up MooMapper. Let's get this mod finished already. Click Vice City and All Models and All Textures (Very Slow) and launch it. Here's what we'll see.
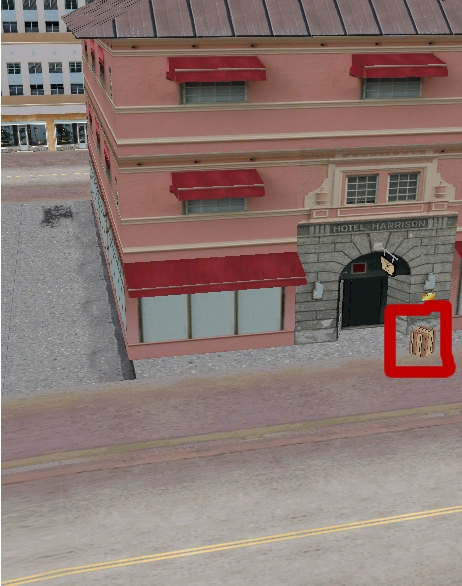
Alright, this is actually a really simple process. The maps are broken down into two files, IDE and IPL files. IDE means Item DEfinition and IPL mean Item PLacement. IDE is where we go first to define the object to be recognized as a Vice City object. Near the top left corner, hit the Item Definition tab. Right under that and a little to the right is New, so click that. Navigate to the maps folder and to where you created your folder and dropped in the colfile. Name your IDE the same as the collision file, so mine is crate.ide. When it asks to add reference to gta_vc.dat, click yes. This means when the game starts, it will read this IDE file and load it. At the top left list, scroll down to find your new IDE file and click it. A little under the IDE list it'll say Add. Click it. Where it says Model Name type in the .dff file you added to the gta3.img file, and type in the .txd file where it says Texture Name. With my MooMapper, the texture found still has a red X on it, and I fix it by erasing one letter of my model name and adding the letter back. I don't know why, but that's what you do if that happens. This is very important - to the right of Model Name, it says LOD Value, type in 250. It's a good number to use and if you leave it 0 your item won't be visible, and if it's over 300 the game crashes. 250 is a good medium so use that and close the little box. If you look in the list, you'll see your object and a model number. Remember this for later, as it is important when placing it (The number should be like, 4795 or something close to that.) Now at the top, click the Item Placement tab. Now we're going to add it to the map! This is the fun part, so be creative! First off, hit New to make a new IPL file. Do the same thing as IDE - go to your folder with the IDE and COL file and type the same name as everything else, so mine is crate.ipl. Add the reference and get ready for your computer to (possibly) slow down drastically. Where it says 'Visible Files:' on the right side, check the box that says washingtn.ipl. It'll load that scene. Now center it by double clicking on the loaded washingtn.ipl file in the right Visible Files list. Let's see what it looks like:
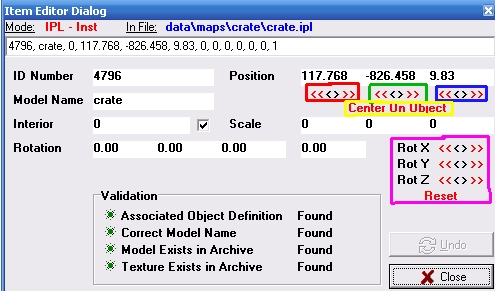
The red circle is the alley you start in right in the beginning, so let's put it around there to see if it works! On the top right list, find your IPL file and hit Add underneath the list. Where it says ID Number, put in the model number (first objects should be close to 4795.) Model Name, put in the name of your object. You should see 3 colored lines called Axis pop up on the viewer. The blue is Z (height), Y is green (North - South), and X is red (East - West.) You can hold the right mouse button to orbit around, left mouse button to pan the view, and if you hold both the left mouse button and Control key, you can drag the object around the map. The controls are as follows:
Red = X Axis
Green = Y Axis
Blue = Z Axis
Yellow = Click to center camera on object
Purple = Rotate object
Use these to change the position of your object. I put mine here for easy testing:
We're not done yet. When you've placed your file, do a File -> Save Modified Files. If they fail, they're read only, so you have to fix that. The fix is listed above, in the Prepping and Editing Directory section. We're done with MooMapper once it saves so we can close that out. This last bit is extremely short but the most important step. Linking the Collision.
Linking the Collision to the Data File
Alright guys, let's finish this off! Here's what to do - go to the directory of the game (C:/Program Files/Rockstar Games/Grand Theft Auto: Vice City) and go to Data. You'll see a file named gta_vc.dat. We can open this with Notepad, so do so. (You can double click on it, pick open with a program, and select Notepad.) Scroll down this text and look for this line:
COLFILE 0 MODELS\COLL\GENERIC.COL
Hit enter and start typing DIRECTLY BELOW THIS LINE, no gaps between this one and the one you're adding. Type this:
COLFILE 0 DATA\MAPS\YOURFOLDERHERE\YOURCOLFILEHERE.COL
Where it says YOURFOLDERHERE, type in the name of the folder that you made earlier that contains the IDE, IPL, and your colfile. Where it says YOURCOLFILEHERE.COL, you'd type the name of your collision file. Mine is:
COLFILE 0 DATA\MAPS\crate\crate.col
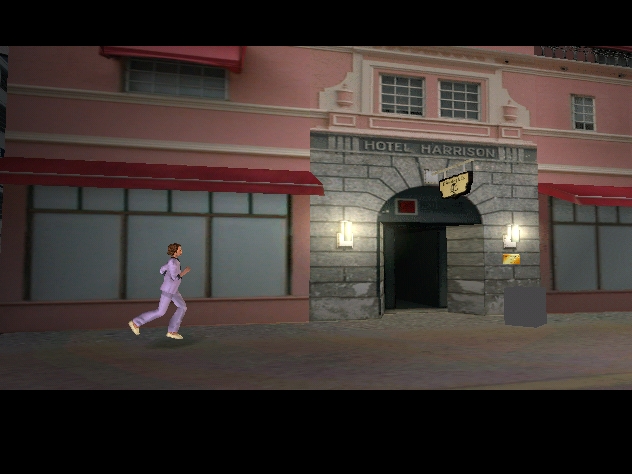
But yours may vary in file name and folder name. Got it? Great. File -> Save. You're done. Test it out. How does mine work? Let's see!
Textures aren't working. Well, yours are probably fine. Well, that's how you make and add an object to Vice City. Hope this helped anyone out there!
 . Now we click on our box and start. Now start right clicking every Face on your box until your entire box is red. You should orbit around in your 3D view to make sure it's all red. You might need to change view modes by clicking on the icon next to the title of each view. When you're done, change one view mode except your 3D to UV Mapper. Press Surface -> Mapping -> Assign UV. Now is where it gets a tad bit confusing... Left click on one triangle (polygon) your box and it should look like this.
 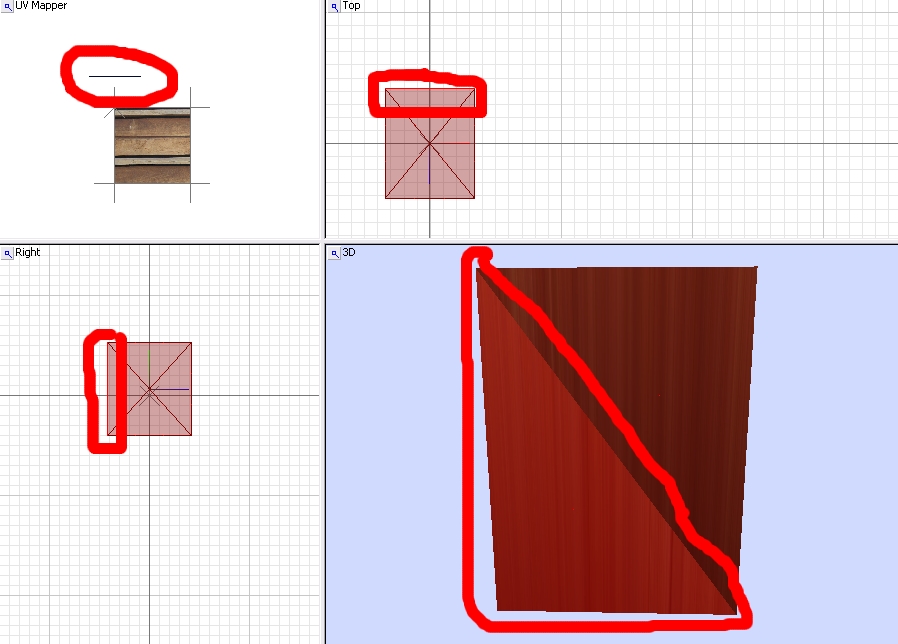 ) and now you can edit the UV View polygon. I fixed this one, so now I have to fix the rest to match.
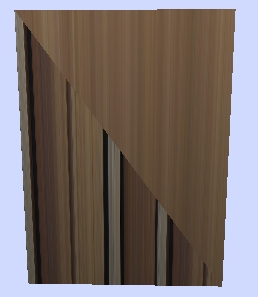
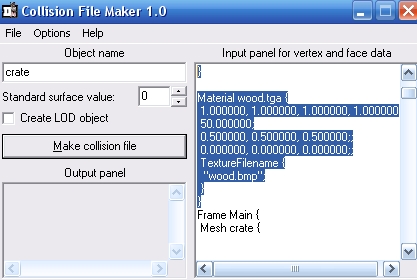 See where it says 'Frame Main {'? Delete EVERYTHING above that, starting with that single }. You should have this: